

When it comes to desserts, there’s something truly magical about cheesecakes. The creamy texture, the rich flavors, and the way they just melt in your mouth evoke feelings of comfort and joy. Now, imagine this delightful experience packed into adorable little cups with the irresistible taste of Biscoff cookies. That’s exactly what my No-Bake Biscoff Cheesecake Cups offer! As a busy mom who often finds myself cooking alongside my son, I cherish recipes like this that require minimal effort yet deliver maximum indulgence. Plus, they’re perfect for any occasion, whether it’s a family gathering or a cozy night in.
The best part? These No-Bake Biscoff Cheesecake Cups are incredibly easy to make. With no oven required, you can whip them up quickly, allowing you to spend more time enjoying the company of your loved ones. The luscious cream cheese filling layered over a crunchy Biscoff base is a match made in dessert heaven. Trust me; once you take that first spoonful, you’ll understand why this dessert has found a special place in our hearts (and on our holiday table). Let’s dive into why you’ll love this recipe!
Why You’ll Love This Recipe
Effortless Preparation
One of the standout features of these No-Bake Biscoff Cheesecake Cups is how simple they are to prepare. You don’t need to worry about baking times or keeping an eye on the oven. Instead, you’ll be mixing ingredients and layering them in cups, which is a fun activity to do with kids. My son loves helping me crush the cookies, and it’s a great way to bond while creating something delicious!
Rich and Decadent Flavor
If you’ve ever tasted Biscoff cookies, you know they bring a unique caramelized flavor that’s simply divine. By incorporating these cookies into the cheesecake, you’re adding an extra layer of richness and a delightful crunch. The creamy cheesecake filling complements the Biscoff perfectly, resulting in a dessert that’s not just tasty but also sophisticated.
Customizable for Any Occasion
These cheesecake cups are incredibly versatile. Whether you’re celebrating a birthday, hosting a dinner party, or just indulging on a Wednesday night, they fit right in. You can easily adapt the recipe by adding different toppings or flavors, making it a go-to dessert for any occasion. The kids can even decorate their cups with sprinkles or chocolate shavings for a festive touch!
Make-Ahead Convenience
With the hustle and bustle of daily life, having a make-ahead dessert is a game-changer. These No-Bake Biscoff Cheesecake Cups can be prepared a day in advance and stored in the refrigerator, making them an ideal choice for busy parents like myself. Just grab them when you’re ready to serve, and you’ll impress your guests with minimal effort!
Ingredients
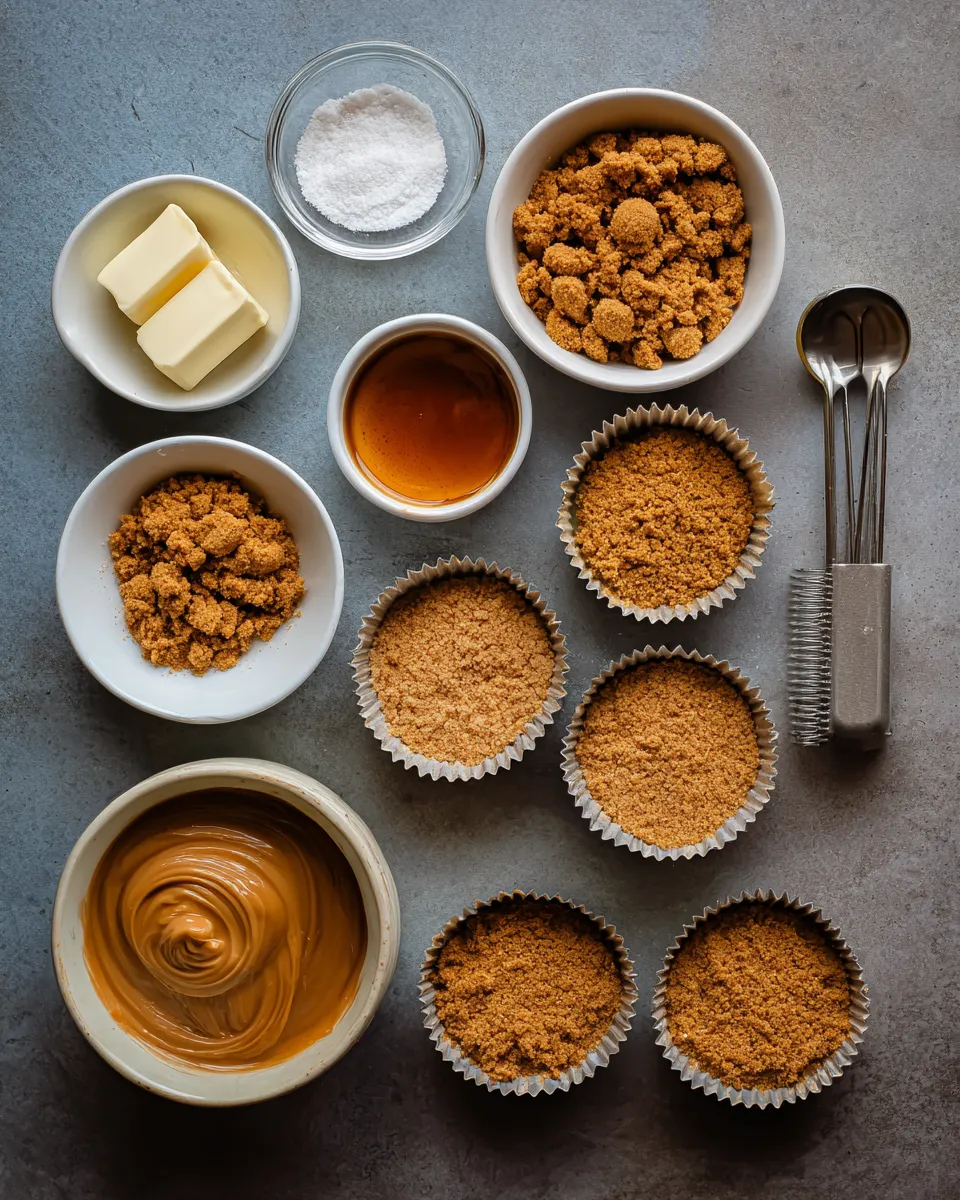
Let’s gather what you need to create these delightful cups. The ingredients are fairly simple, and most of them you might already have at home!
Full List of Ingredients
- 1 cup Biscoff cookies, crushed (plus extra for topping)
- 4 tablespoons unsalted butter, melted
- 8 oz cream cheese, softened
- 1 cup powdered sugar
- 1 teaspoon vanilla extract
- 1 cup heavy whipping cream
- 1/4 cup Biscoff spread
- Pinch of salt
Step-by-Step Instructions
Step 1: Prepare the Biscoff Crust
Start by placing your Biscoff cookies in a food processor. Pulse them until you achieve fine crumbs—this should take about 30 seconds. If you don’t have a food processor, you can place the cookies in a zip-top bag and crush them with a rolling pin. Once you have your cookie crumbs, transfer them to a mixing bowl and pour in the melted butter. Stir until the mixture resembles wet sand. This step is crucial as the butter binds the crumbs together, creating a sturdy base for your cups.
Step 2: Assemble the Crust
Now, it’s time to form the crust in your cups. Take a tablespoon of the Biscoff mixture and press it firmly into the bottom of each serving cup. Make sure to pack it down tightly; this will help keep the crust intact when you add the cheesecake filling. You can use the back of a spoon to ensure it’s even. Aim for a nice layer—about a half-inch thick works well.
Step 3: Whip the Cream
In a separate mixing bowl, pour in the heavy whipping cream. Using an electric mixer, beat on medium-high speed until soft peaks form, which takes about 2-3 minutes. Soft peaks mean that the cream should form gentle peaks that hold their shape but still look a bit droopy. This step adds lightness to your cheesecake filling and balances the richness of the cream cheese.
Step 4: Mix the Cream Cheese Filling
In another bowl, beat the softened cream cheese until smooth. Add the powdered sugar, vanilla extract, and a pinch of salt, and mix until combined. The mixture should be creamy and free of lumps. Then, gently fold in the whipped cream you prepared earlier. Use a spatula to combine, being careful not to deflate the whipped cream too much. This step is key to achieving that light and airy cheesecake texture.
Step 5: Incorporate Biscoff Spread
Next, take the 1/4 cup of Biscoff spread and gently swirl it into the cheesecake mixture. Don’t mix it completely; you want to create beautiful ribbons of Biscoff throughout the filling. This adds a delightful surprise of flavor with every bite. The warm, caramel notes of the spread blend seamlessly with the cheesecake, enhancing the overall taste.
Step 6: Layer the Cheesecake Filling
Now it’s time to assemble your cups! Spoon the cheesecake filling over the crust in each cup, filling them about three-quarters full. You can use a piping bag for a more polished look, or just a spoon works perfectly fine too. Make sure to smooth the tops with your spatula. This is where the magic happens—the creamy filling will set beautifully in the fridge, creating those delectable layers.
Step 7: Chill in the Refrigerator
After you’ve filled all the cups, place them in the refrigerator for at least 4 hours, or overnight for best results. Chilling allows the cheesecake to firm up and the flavors to meld together. You’ll know they’re ready when they feel set to the touch and have a nice, cool texture. This is a great time to clean up your kitchen, leaving you with less mess once it’s time to serve!
Step 8: Garnish and Serve
When you’re ready to serve, take the cups out of the fridge and garnish with crushed Biscoff cookies on top. You can also add a dollop of whipped cream or a drizzle of Biscoff spread for an extra touch of indulgence. Serve immediately, and watch as everyone digs in with excitement. The moment they take their first spoonful, smiles will light up the room!
What to Serve with This Recipe
Suggested Pairings
These No-Bake Biscoff Cheesecake Cups can stand alone as a stunning dessert, but they also pair wonderfully with other treats. Consider serving them alongside:
- A cup of freshly brewed coffee or espresso
- Hot chocolate for a cozy touch
- Fruit skewers for a refreshing contrast
- Chocolate-dipped strawberries for a decadent twist
Variations and Substitutions
Gluten-Free Option
If you’re looking for a gluten-free version, you can substitute the Biscoff cookies with gluten-free cookies or even graham crackers. Just make sure to check the labels to ensure they meet your dietary needs!
Vegan Version
For a vegan twist, use dairy-free cream cheese and coconut cream in place of heavy whipping cream. You can also swap out the Biscoff spread for a nut butter or a vegan chocolate spread to keep the flavors rich and delightful.
Flavor Variations
Feeling adventurous? You can switch up the flavors by adding different extracts or flavorings. Try almond extract for a unique twist, or even mix in some lemon juice for a zesty kick. You can also layer in fruit preserves or chocolate ganache for added richness.
Mini Cupcakes
Instead of serving these as cups, you can adapt the recipe into mini cheesecakes. Use a muffin tin with cupcake liners, layer the crust and filling, and bake for a few minutes to set if desired. Just be sure to adjust the chilling time accordingly!
Storage Instructions
Refrigeration
These No-Bake Biscoff Cheesecake Cups can be stored in the refrigerator for up to 4 days. Simply cover them with plastic wrap or store them in an airtight container to keep them fresh. They’re a great make-ahead dessert, perfect for parties or meal prepping!
Freezing
If you want to save them for later, you can freeze the cheesecake cups. Just make sure to wrap them tightly in plastic wrap and then place them in an airtight container. They can last in the freezer for about 1 month. When you’re ready to enjoy, let them thaw in the refrigerator overnight before serving.
Recipe Tips and Tricks
Related Recipes
If you loved these No-Bake Biscoff Cheesecake Cups, you might also enjoy:
- Chocolate Mousse Cups
- Mini Key Lime Pies
- Strawberry Shortcake Parfaits
- Classic Cheesecake with Fresh Berries

Indulgent No-Bake Biscoff Cheesecake Cups
These Biscoff cheesecake cups are a delightful treat with a creamy filling and a crunchy crust, perfect for any occasion.
- Total Time: 4 hours 30 minutes
- Yield: 4 servings 1x
Ingredients
- 1 cup Biscoff cookies, crushed (plus extra for topping)
- 4 tablespoons unsalted butter, melted
- 8 oz cream cheese, softened
- 1 cup powdered sugar
- 1 teaspoon vanilla extract
- 1 cup heavy whipping cream
- 1/4 cup Biscoff spread
- Pinch of salt
Instructions
- Crush Biscoff cookies and mix with melted butter to form crust.
- Press the mixture into the bottom of serving cups to form a sturdy base.
- Whip the heavy cream until soft peaks form.
- Beat the cream cheese, then mix in powdered sugar, vanilla, and salt, and fold in the whipped cream.
- Gently swirl in the Biscoff spread to create ribbons.
- Spoon the cheesecake filling into each cup over the crust.
- Chill in the refrigerator for at least 4 hours or overnight.
- Garnish with crushed Biscoff cookies and serve.
Notes
- For best results, chill overnight.
- Use a piping bag for a more polished cheesecake filling presentation.
- Prep Time: 30 minutes
- Cook Time: 0 minutes
- Category: Dessert
- Method: No-Bake
- Cuisine: American
- Diet: Vegetarian
Nutrition
- Serving Size: 1 cup
- Calories: 400
- Sugar: 25g
- Sodium: 250mg
- Fat: 30g
- Saturated Fat: 18g
- Unsaturated Fat: 10g
- Trans Fat: 0g
- Carbohydrates: 35g
- Fiber: 1g
- Protein: 5g
- Cholesterol: 70mg
FAQs
Can I make these cheesecake cups ahead of time?
Absolutely! In fact, they taste even better when made a day in advance as the flavors have time to meld together.
How long do these cheesecake cups last in the fridge?
They can be stored in the refrigerator for up to 4 days if kept in an airtight container.
Can I use a different type of cookie for the crust?
Yes! Feel free to substitute with any cookie you enjoy, such as Oreos or graham crackers.
What if I don’t have a food processor?
No problem! You can crush the cookies by placing them in a zip-top bag and using a rolling pin or even a meat mallet.
Is it necessary to use heavy cream?
For the best texture, I recommend using heavy whipping cream. However, you can substitute with whipped topping if you prefer.
Can I make this recipe dairy-free?
Yes! Use dairy-free cream cheese and coconut cream instead of heavy cream for a delicious vegan option.
How can I make the presentation more appealing?
Consider using clear cups to showcase the beautiful layers of your cheesecake. You can also add decorative toppings like fresh fruit or chocolate shavings.
Conclusion
Creating these No-Bake Biscoff Cheesecake Cups is not just about the dessert; it’s about sharing moments of joy with family and friends. With their rich flavor, effortless preparation, and customizable nature, they truly embody everything I love about cooking. Whether you’re celebrating a special occasion or simply treating yourself, these delightful cups will satisfy your sweet tooth and leave everyone asking for seconds. So, roll up your sleeves, gather your ingredients, and let the fun begin in your kitchen!