

Introduction
Hello, fellow food lovers! I’m Jenny, the heart and soul behind Recipes Cookery. Today, I’m excited to share one of my all-time favorite desserts: the Chocolate Chip Cannoli Pie. This decadent treat is a delightful twist on the traditional Italian cannoli, combining a rich filling with a crisp, buttery crust. It’s perfect for any occasion, especially when you want to impress family and friends!
As a mom, I cherish the moments spent in the kitchen with my son, and this recipe is one that he loves to help make. Whether you’re a seasoned chef or just starting out, this indulgent pie is easy to whip up and guaranteed to bring smiles all around.
Ingredients
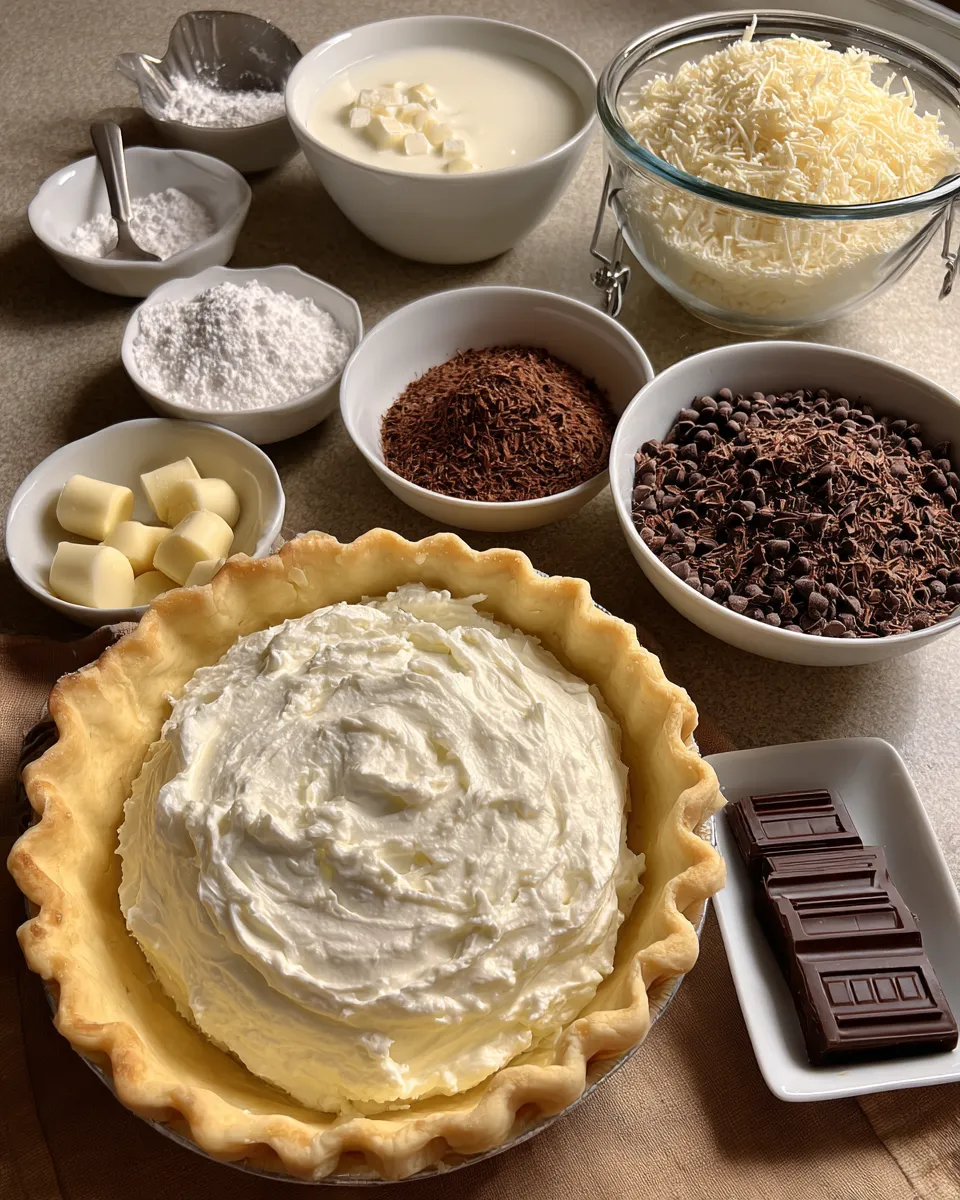
Before we dive into the recipe, let’s gather our ingredients. You’ll need:
- 1 pre-made pie crust (store-bought or homemade)
- 15 oz ricotta cheese
- 1 cup powdered sugar
- 1 teaspoon vanilla extract
- 1 cup mini chocolate chips
- 1 cup heavy whipping cream
- 2 tablespoons unsweetened cocoa powder
- Chocolate shavings for garnish (optional)
These ingredients are easy to find at your local grocery store. I often incorporate seasonal flavors, so feel free to switch things up with flavored extracts or different types of chocolate chips!
Timing
Timing is everything in cooking, and this recipe is no exception. Here’s a quick breakdown:
- Preparation time: 20 minutes
- Chill time: 2 hours (or overnight for best results)
- Cooking time: 10 minutes (if baking the crust)
In total, you’ll need about 2 hours and 30 minutes from start to finish. Just enough time to prepare and relax before serving!
Step-by-Step Instructions
Let’s get to the fun part! Follow these simple steps to create your Chocolate Chip Cannoli Pie.
Step 1: Prepare the Pie Crust
If you’re using a store-bought pie crust, simply follow the package instructions. If you prefer to make your own, roll it out, place it in your pie dish, and bake at 350°F for 10 minutes. Allow it to cool completely.
Step 2: Make the Filling
In a mixing bowl, combine the ricotta cheese, powdered sugar, and vanilla extract. Beat until smooth. This is where your kitchen will start smelling heavenly!
Step 3: Add the Chocolate Chips
Gently fold in the mini chocolate chips. The more, the merrier, right? You can add as many as you like!
Step 4: Whip the Cream
In a separate bowl, whip the heavy cream and cocoa powder until soft peaks form. This will give your pie that rich, luscious texture.
Step 5: Combine Everything
Fold the whipped cream into the ricotta mixture. Be gentle! You want to keep it fluffy.
Step 6: Fill the Pie
Scoop the filling into the cooled pie crust, spreading it evenly. You can leave it as is or create a fancy swirl with the back of a spoon.
Step 7: Chill and Serve
Cover the pie with plastic wrap and refrigerate for at least 2 hours. This step is crucial for allowing the flavors to meld together.
Nutritional Information
Before indulging, let’s take a look at the nutritional info for a slice of this Chocolate Chip Cannoli Pie:
- Calories: 350
- Fat: 22g
- Carbohydrates: 30g
- Protein: 5g
Keep in mind that this is a dessert, so enjoy it in moderation!
Healthier Alternatives
If you’re looking to lighten things up, I’ve got some simple swaps:
- Use low-fat ricotta cheese instead of full-fat.
- Swap powdered sugar for a sugar substitute.
- Use a graham cracker crust instead of a traditional pie crust for fewer calories.
These alternatives can help make this delicious pie a bit more guilt-free without sacrificing flavor!
Serving Suggestions
Now that your pie is ready, how do you serve it? Here are some ideas:
- Top with chocolate shavings for a fancy touch.
- Drizzle with chocolate sauce or caramel for extra sweetness.
- Garnish with fresh berries to add a pop of color.
Pair your Chocolate Chip Cannoli Pie with a scoop of vanilla ice cream for a delightful dessert experience!
Common Mistakes to Avoid
Even the best chefs can make mistakes! Here are a few to watch out for:
- Not chilling the pie long enough can lead to a runny filling.
- Using fresh ricotta instead of well-drained ricotta can make the filling watery.
- Overmixing the whipped cream can turn it into butter.
With a little attention to detail, you can avoid these pitfalls and create a stunning dessert!
Storage Tips
After enjoying your delicious pie, you might be wondering how to store the leftovers. Here’s what to do:
- Cover tightly with plastic wrap or aluminum foil.
- Store in the refrigerator for up to 3 days.
- Freezing is not recommended, as it affects the texture.
Make sure to keep it chilled, so it stays fresh and tasty!
Conclusion
Creating a Chocolate Chip Cannoli Pie is an enjoyable and rewarding experience, perfect for family gatherings or special occasions. With its creamy filling and delightful chocolate chips, this pie is sure to become a favorite in your home, just like it is in mine!
Remember, cooking should be fun and stress-free. I encourage you to embrace your culinary journey and make this pie your own. Don’t forget to share your creations with me on social media!
FAQs
Can I use a different type of cheese?
Absolutely! Mascarpone cheese is a delicious alternative and will give the pie a richer flavor.
How can I make this recipe gluten-free?
Simply use a gluten-free pie crust, and you’re good to go!
Can I add fruit to the filling?
Yes! Chopped strawberries or raspberries would add a lovely freshness to the pie.
Final Thoughts
I hope you enjoyed this recipe for Chocolate Chip Cannoli Pie as much as I love sharing it with you. Cooking and baking bring joy, and I encourage you to create memorable moments in the kitchen with your loved ones. Happy baking, and see you next time!
Print
Indulgent Chocolate Chip Cannoli Pie: A Decadent Treat
A delightful dessert combining the classic flavors of cannoli in a pie form, filled with rich ricotta and chocolate.
- Total Time: 2 hours 30 minutes
- Yield: 8 servings 1x
Ingredients
Before we dive into the recipe, let’s gather our ingredients. You’ll need:
- 1 pre-made pie crust (store-bought or homemade)
- 15 oz ricotta cheese
- 1 cup powdered sugar
- 1 teaspoon vanilla extract
- 1 cup mini chocolate chips
- 1 cup heavy whipping cream
- 2 tablespoons unsweetened cocoa powder
- Chocolate shavings for garnish (optional)
These ingredients are easy to find at your local grocery store. I often incorporate seasonal flavors, so feel free to switch things up with flavored extracts or different types of chocolate chips!
Instructions
- Prepare the pie crust according to package instructions or bake your homemade crust at 350°F for 10 minutes and let it cool.
- In a mixing bowl, combine ricotta cheese, powdered sugar, and vanilla extract; beat until smooth.
- Gently fold in mini chocolate chips.
- In a separate bowl, whip heavy cream with cocoa powder until soft peaks form.
- Fold the whipped cream into the ricotta mixture carefully.
- Fill the cooled pie crust with the mixture, spreading it evenly.
- Cover and refrigerate for at least 2 hours before serving.
Notes
- For added flavor, consider using flavored extracts or different types of chocolate chips.
- Chocolate shavings can be used for garnish before serving.
- Prep Time: 20 minutes
- Cook Time: 10 minutes
- Category: Dessert
- Method: Mixing and Chilling
- Cuisine: Italian
- Diet: Vegetarian
Nutrition
- Serving Size: 1 slice
- Calories: 320
- Sugar: 25g
- Sodium: 150mg
- Fat: 18g
- Saturated Fat: 10g
- Unsaturated Fat: 8g
- Trans Fat: 0g
- Carbohydrates: 35g
- Fiber: 1g
- Protein: 6g
- Cholesterol: 50mg