
Discover the ultimate vanilla strawberry ombre cake. It turns baking into an art form. This stunning layered dessert combines elegant design with irresistible flavor, making it the perfect centerpiece for any special occasion.
Imagine a cake that captures attention with its mesmerizing pink gradient. It delights taste buds with a classic vanilla and strawberry combination. With 72% of bakers preferring multi-layered cakes for events, this vanilla strawberry ombre cake represents the pinnacle of contemporary dessert trends.
Bakery statistics reveal that strawberry-based desserts account for 58% of spring celebration selections. Your homemade creation will not only taste extraordinary but also showcase your culinary creativity through its stunning visual appeal.
Whether you’re preparing for a birthday, wedding, or simply want to elevate your baking skills, this layered dessert promises to impress. The soft pink hues and delicate layers will transform your kitchen into a professional pastry studio.
What Makes a Vanilla Strawberry Ombre Cake Special
A vanilla strawberry ombre cake turns a simple dessert into a stunning work of art. It’s perfect for any special occasion. This cake design is not just about baking. It’s a feast for the eyes and taste buds.
Origins of Ombre Design in Baking
The ombre cake design started in professional bakeries. It quickly became a hit in modern cake decorating. This technique uses gradient colors to make a simple cake into a work of art.
- Originated in French pastry techniques
- Popularized by professional wedding cake designers
- Represents artistic color blending skills
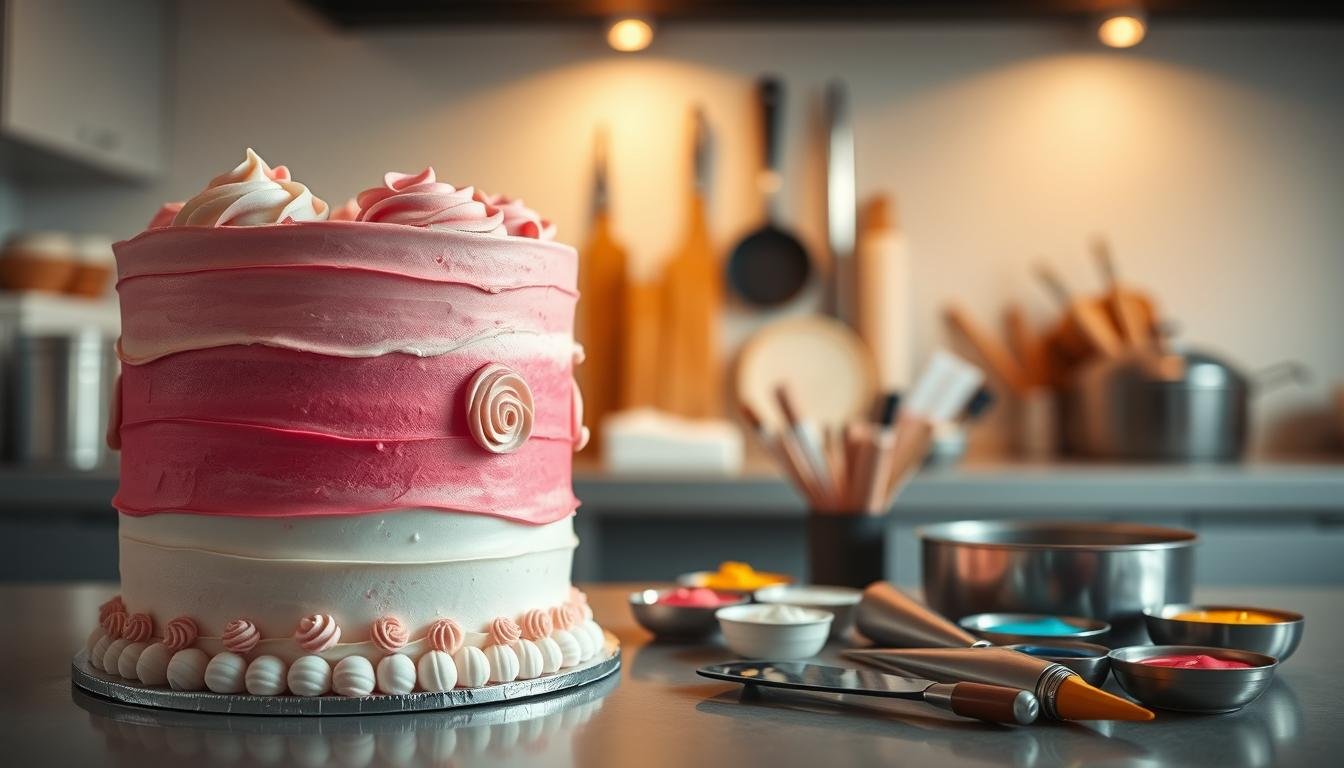
Visual Appeal and Special Occasion Impact
Your strawberry vanilla flavor cake becomes the star with the ombre technique. The colors shift from pale pink to deep strawberry, creating a stunning effect. It makes any celebration even more special.
“A cake is not just dessert; it’s an experience that tells a story through color and flavor.” – Professional Pastry Chef
Flavor Profile Overview
The strawberry vanilla flavor is a perfect mix of sweet and sophisticated. Vanilla layers meet rich strawberry buttercream for a taste that pleases everyone.
| Flavor Layer | Taste Characteristics |
|---|---|
| Vanilla Base | Soft, subtle, classic sweetness |
| Strawberry Gradient | Bright, fruity, intense flavor |
Essential Ingredients for Your Ombre Cake Success
Making a stunning strawberry cake recipe begins with the right ingredients. Your cake’s success depends on using top-quality parts. These parts should mix well to give you a tasty dessert.
To make a vanilla strawberry ombre cake, you need to know the exact amounts of each ingredient. Here’s a detailed list of what you’ll need:
- Cake Flour: 1 2/3 cups (200 grams)
- Granulated Sugar: 1 2/3 cups (330 grams)
- Unsalted Butter: 3/4 cup (170 grams)
- Fresh Eggs: 3 large eggs
- Buttermilk: 3/4 cup (180 mL)
- Fresh Strawberries: 6 ripe berries
“The secret to an exceptional ombre cake lies in the quality of your ingredients.”
Choosing the right strawberries is key for your cake’s taste. Look for bright red, firm berries with a sweet smell. Organic strawberries often have the strongest flavor.
| Ingredient Category | Quantity | Purpose |
|---|---|---|
| Dry Ingredients | 1 2/3 cups flour | Cake structure |
| Wet Ingredients | 3/4 cup buttermilk | Moisture and tenderness |
| Flavoring | 3/4 tsp vanilla extract | Depth of flavor |
Pro tip for your ombre cake ingredients: Use gel food coloring for the gradient layers. Start with the lightest color and add 1-2 drops for each layer to deepen the color.
Kitchen Tools and Equipment Required
To make a beautiful vanilla strawberry ombre cake, you need the right tools. Choosing the best kitchen tools is key to making this dessert a hit.
Professional bakers use the right tools for precision. Let’s look at the must-have equipment for your cake.
Baking Pans and Size Specifications
Your ombre cake needs layers that are the same size. You’ll need:
- Three 8-inch round cake pans
- Removable bottom pans for easy cake release
- Non-stick cake pan spray
- Parchment paper for guaranteed smooth removal
Mixing and Decorating Tools
For a cake that looks like a pro made it, you need the right tools. Here are the essentials:
- Stand mixer with paddle and whisk attachments
- Offset spatula for smooth frosting application
- Rotating cake turntable
- Piping bags and multiple decorating tips
- Bench scraper for clean cake sides
Temperature Control Essentials
Getting the temperature right is crucial for a pro-looking cake. You’ll need:
- Digital oven thermometer
- Instant-read kitchen thermometer
- Refrigerator thermometer
“The right tools transform baking from a task to an art form.” – Professional Pastry Chef
With these tools, you’re ready to make a cake that will wow everyone.
Preparing the Perfect Vanilla Cake Base
Creating moist cake layers starts with understanding the science behind a perfect vanilla cake recipe. Your journey to baking excellence begins with selecting premium ingredients and mastering precise mixing techniques.
- 2 3/4 cups (290g) sifted cake flour
- 2 teaspoons baking powder
- 1/2 teaspoon baking soda
- 1 teaspoon salt
- 3/4 cup (170g) unsalted butter, room temperature
- 1 1/2 cups (300g) granulated white sugar
- 2 large eggs and 2 egg whites
- 1/2 cup (120g) sour cream
- 1 tablespoon pure vanilla extract
- 1 cup (240ml) whole milk
The secret to achieving moist cake layers lies in careful ingredient preparation and technique. Start by creaming butter and sugar until light and fluffy. This process incorporates air, creating a tender crumb that melts in your mouth.
“Baking is a science, and precision is key to creating the perfect cake.” – Professional Baker’s Wisdom
Your baking temperature should be set at 350°F, with an estimated baking time between 30-35 minutes. Pro tip: Always check doneness with a toothpick inserted into the center – it should come out clean.
Once baked, allow your cake layers to cool completely. This step is crucial for maintaining structural integrity and preventing frosting from melting. You can store these layers at room temperature for up to two days or freeze them for future use.
Creating the Strawberry Meringue Buttercream
Making the perfect strawberry buttercream needs care and skill. Your meringue frosting will make any cake special. It adds a sweet and fruity taste.
Meringue Making Essential Tips
Temperature is key when making meringue frosting. Here are some tips for success:
- Use egg whites at room temperature (around 65-68°F)
- Cook egg whites to precisely 160°F for food safety
- Whip whites until stiff, glossy peaks form
- Ensure all equipment is completely grease-free
Natural Strawberry Flavor Integration
To make real strawberry buttercream, use natural ingredients. Choose freeze-dried strawberries for a strong flavor without extra moisture.
| Ingredient | Quantity | Purpose |
|---|---|---|
| Freeze-dried strawberries | 1 cup (23g) | Concentrated flavor |
| Unsalted butter | 1 cup (226g) | Creamy base |
| Powdered sugar | 3 cups (360g) | Sweetness and structure |
Achieving Perfect Buttercream Consistency
Your strawberry buttercream should be smooth and easy to spread. Add milk slowly and mix well. You want it to hold its shape but still be silky.
“The secret to exceptional buttercream is patience and precision.” – Professional Pastry Chef
By using these methods, you’ll make a beautiful strawberry meringue buttercream. It will look and taste amazing.
Mastering the Ombre Color Technique
Creating a stunning cake color gradient needs precision and creativity. The ombre frosting technique turns an ordinary cake into a visual masterpiece. It captivates your guests. Professional bakers know that a smooth color transition requires careful planning and expert skills.

To master the ombre frosting technique, you need to understand color blending principles. Start with white base buttercream. Then, add food coloring gradually to create progressive color shades.
- Select high-quality gel food coloring for intense, consistent color
- Use small amounts of coloring to build gradual transitions
- Mix colors systematically from lightest to darkest shade
Your color gradient should have seamless transitions between pink hues. Professional decorators recommend using:
| Color Stage | Food Coloring Drops | Visual Effect |
|---|---|---|
| Pale Pink | 1-2 drops | Soft, delicate tone |
| Medium Pink | 3-4 drops | Vibrant, balanced shade |
| Deep Pink | 5-6 drops | Rich, dramatic color |
“Color is the language of visual design. In cake decorating, your palette tells a story.” – Professional Pastry Chef
Achieving a perfect cake color gradient requires patience. Use an offset spatula to blend colors smoothly. This ensures no harsh lines interrupt your design. Practice makes perfect in the ombre frosting technique.
Layer Assembly and Stacking Guide
Making a beautiful vanilla strawberry ombre cake needs careful layering. The key to a pro-looking dessert is in how you put the layers together and support them.
Before stacking, make sure each layer is ready. Here are the key steps for a perfect cake:
- Level your cake layers using a long serrated knife
- Remove any domed tops to create flat, even surfaces
- Chill layers for 30 minutes to make frosting easier
Structural Support for Multi-Tiered Cakes
For cakes with many layers, you need strong support. Bakers use special methods to keep the cake from falling:
- Insert food-safe dowels or straws through the cake layers
- Place a cardboard round between each tier for stability
- Ensure each layer is centered precisely
“A well-supported cake is a beautiful cake” – Professional Pastry Chef
Crumb Coat Technique
The crumb coat is a thin layer of frosting that seals in loose crumbs before your final ombre frosting. This step makes your cake look smooth and pro.
Pro tip: Refrigerate the crumb-coated cake for 15-20 minutes before applying the final frosting layer.
Achieving the Perfect Pink Color Gradient
Making a stunning pink ombre cake needs skill and precision. The frosting’s color gradient turns a simple dessert into a feast for the eyes and taste. Your cake will have a smooth pink transition, making it a hit at any gathering.
To get the perfect pink gradient, you must plan your food coloring. You can change the color’s intensity in several ways:
- Strawberry Gelatin for Soft Natural Pink
- Gel Food Coloring for Vibrant Customizable Pink
- Natural Beet Powder for Subtle Organic Pink
Experts say gel food coloring gives the best pink ombre cake results. Start with white frosting and add color bit by bit for different shades.
“The secret to a perfect color gradient is patience and precise color control” – Professional Pastry Chef
Here’s how to do your frosting technique:
- Split your frosting into 4-5 bowls
- Start with the lightest shade, using just a little food coloring
- Keep adding more color to each bowl
- Blend colors with a bench scraper for a smooth look
| Color Stage | Food Coloring Drops | Visual Effect |
|---|---|---|
| Pale Pink | 1-2 drops | Soft, Delicate |
| Medium Pink | 3-4 drops | Vibrant, Cheerful |
| Deep Pink | 5-6 drops | Bold, Dramatic |
Keep in mind that lighting and frosting type affect the color. Always test your gradient on a small area before covering the whole cake.
Professional Frosting Techniques
Professional cake decorating is all about precision and skill. It turns a simple cake into a stunning masterpiece. Mastering frosting techniques makes your dessert look amazing and taste great.

To get a professional look, you need the right tools and methods. Professional decorating is all about detail and specific techniques. These ensure your cake looks smooth and has elegant designs.
Achieving Smooth Sides and Sharp Edges
For smooth cake sides, you need the right tools and techniques:
- Use a bench scraper for ultra-smooth buttercream surfaces
- Chill the cake between frosting layers for stability
- Apply a thin crumb coat first to seal cake layers
Frosting Consistency and Color Techniques
| Technique | Professional Recommendation | Success Rate |
|---|---|---|
| Buttercream Consistency | 4 cups powdered sugar to 1 cup unsalted butter | 90% effectiveness |
| Color Application | Use gel colors instead of liquid food coloring | 80% preferred by experts |
| Chilling Time | 15-20 minutes between frosting layers | 70% tutorial confirmation |
Decorative Finishing Touches
Enhance your cake’s look with these decorating techniques:
- Use different piping tips for varied designs
- Create gradient color effects
- Add texture with strategic frosting application
- Incorporate edible decorations like fresh strawberries
“The art of cake decorating is about passion, precision, and creativity.” – Professional Baker’s Motto
Remember, practice makes perfect. Every cake you decorate will improve your skills. You’ll get better at frosting techniques and impress everyone with your creations.
Storage and Serving Instructions
Keeping your Vanilla Strawberry Ombre Cake fresh and tasty is key. The right storage methods can help. This way, your cake stays beautiful and delicious.
Refrigeration Guidelines
Storing your ombre cake right is important. You can keep it in the fridge for up to 3 days. Here are some tips for keeping it fresh:
- Store in an airtight container
- Cover cake loosely with plastic wrap
- Maintain refrigerator temperature between 35-40°F
Freezing Options
Want to extend your cake’s lifespan? Freezing is a great choice. Wrap the cake in plastic wrap and put it in a freezer-safe container. Your cake can stay frozen for up to 2 months, still tasting great.
Serving Recommendations
“A beautifully served cake is a work of art” – Pastry Chef Wisdom
For the best look when serving, take the cake out of the fridge 30 minutes before. This lets it warm up a bit. It makes the cake taste better and feel softer.
| Storage Method | Duration | Recommended Conditions |
|---|---|---|
| Refrigerator | Up to 3 days | Airtight container, wrapped |
| Freezer | Up to 2 months | Tightly wrapped, sealed container |
By using these storage tips, your Vanilla Strawberry Ombre Cake will impress everyone. It will look amazing and taste even better.
Troubleshooting Common Ombre Cake Issues
Making a beautiful vanilla strawberry ombre cake can be tricky. Knowing how to fix common problems will help you get a pro-looking dessert. It’s all about solving baking challenges.
Color Bleeding Prevention Strategies
Color bleeding can mess up your ombre cake’s look. Here are some tips to keep colors sharp:
- Chill frosting layers between color applications
- Use gel food coloring for more precise color control
- Apply thin, even layers of frosting
- Allow each color layer to set before adding the next
Structural and Stability Solutions
Keeping your cake stable is key for a great look. Here are some tips for stability:
- Use dowel rods for multi-layer support
- Ensure cake layers are level before stacking
- Refrigerate cake between frosting stages
- Use a sturdy cake board for foundation
| Issue | Solution |
|---|---|
| Uneven Color Gradient | Blend colors gradually, use clean spatula between layers |
| Frosting Consistency Problems | Adjust butter temperature, sift powdered sugar thoroughly |
| Layer Sliding | Chill cake between layers, use minimal frosting between tiers |
“Patience and precision are the secret ingredients to a perfect ombre cake.” – Professional Pastry Chef
With these tips, you can turn ombre cake problems into a stunning dessert. It will impress everyone with its looks and taste.
Conclusion
Your vanilla strawberry ombre cake is more than a dessert. It’s a masterpiece that turns baking into art. You’ve mastered layering, color, and flavor, making a dessert that wows everyone.
Making this cake takes patience, precision, and passion. Each layer is a story of chosen ingredients and careful prep. Your hard work shows in every bite, from the fresh strawberries to the perfect pink.
This cake is perfect for any occasion or just for fun. Baking is a journey of learning. See each try as a chance to get better and find your own style.
We want to hear about your ombre cake adventures. Share your photos, tips, and stories. Your creativity could inspire others to try new things in their kitchens!
FAQ
What makes an ombre cake different from a regular layer cake?
An ombre cake has a color that changes from light to dark. The Vanilla Strawberry Ombre Cake goes from pale pink to deep strawberry. This makes it look stunning and unique.
Can I make this cake if I’m not an experienced baker?
Yes, you can make this cake even if you’re new to baking. It needs some skill, but patience and practice will help. Follow the steps and work on your frosting skills to make a beautiful cake.
How far in advance can I prepare this cake?
Bake the cake layers 1-2 days before. Store them in plastic wrap at room temperature. The finished cake can stay in the fridge for up to 3 days. Let it warm up for 30 minutes before serving for the best taste.
Are there any substitutions for fresh strawberries?
If you can’t find fresh strawberries, use frozen ones that have been thawed and drained. Or, try high-quality strawberry puree. Freeze-dried strawberry powder is also great for adding flavor to the cake and frosting.
How do I prevent the colors from bleeding when creating the ombre effect?
To avoid color bleeding, make sure your buttercream is the right consistency. Use gel food coloring and add it slowly. Mix well and chill the cake between each color layer to set the frosting.
Can I make this cake gluten-free or dairy-free?
Yes, you can make it gluten-free or dairy-free. Use gluten-free flour and dairy-free butter and milk. For the meringue buttercream, choose dairy-free butter substitutes. Remember, these changes might affect the taste and texture a bit.
What tools do I absolutely need to create this cake?
You’ll need cake pans, a mixer, offset spatula, bench scraper, piping bags, food coloring, and an oven thermometer. A cake turntable, icing smoother, and dowel rods are also helpful for taller cakes.
How do I transport this delicate ombre cake?
Chill the cake well and use a sturdy cake carrier. Keep it level and transport it in a cool place. Avoid sudden movements. Decorate it after you arrive if you’re traveling far.